Bicycle Service FAQs
Find all the most common answers about bicycle maintenance and operation, tire specifications and other facts.
DIY and save. Keep your bike in perfect running condition. We're here to help.
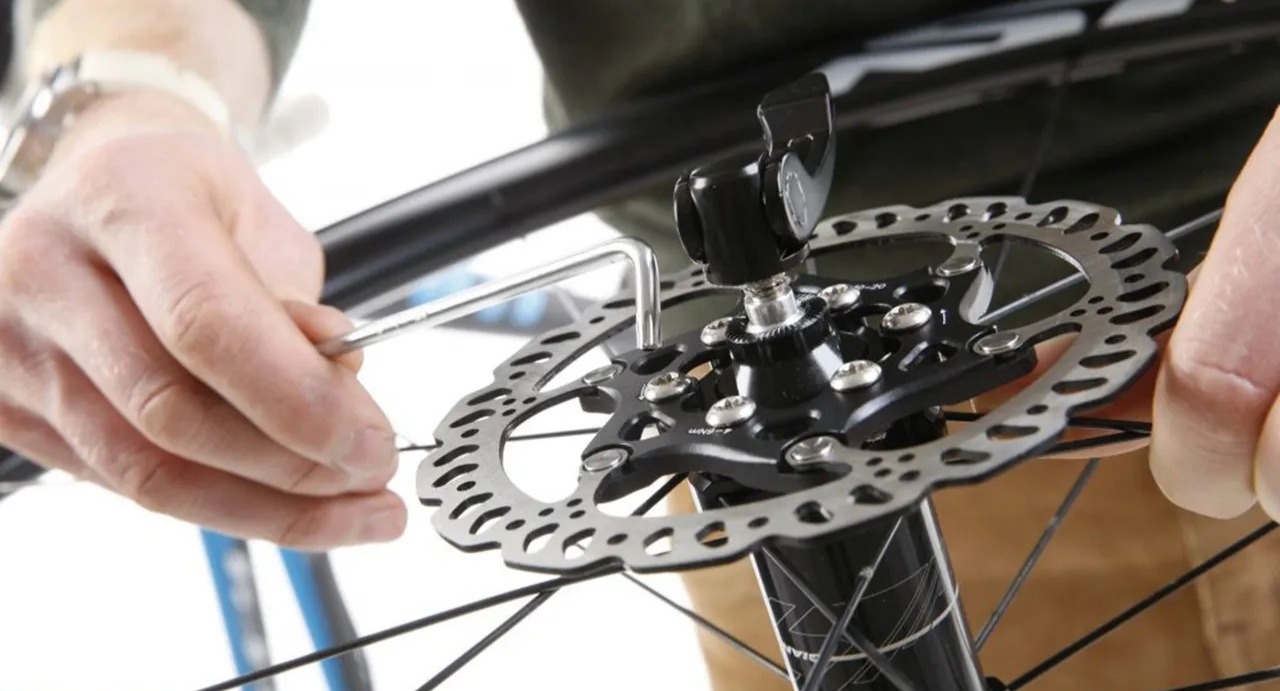
Noisy Brakes?
It happens. Sometimes it is nothing big, other times it could be dangerous. Some causes are:
- Contamination from dirt or oil
- Brake pads are misaligned
- Stuck brake caliper piston
- Failed return spring
- Brake pads are worn out
- Brake caliper is defective
- Brake rotor is damaged, bent, or worn out
- Bolts are loose on the disc or caliper
Enjoy The Ride
- Keep your tires properly inflated
- Clean the drive train periodically
- Oil your chain
- Check the brakes before every ride
- Make sure nothing has come loose before you take off
- Bring water (maybe a snack too)
- Carry a tire flat repair kit
- Wear a helmet
Tire Pressure
Tires lose air every day. Tubeless tires even faster. A road tire can go from 120psi to 110psi in 24-hours.
Her e are a few tips on tire pressure:
- Maximum recommended tire pressure is listed on the side of most tires. Do not exceed this rating. Generally, the smaller the cross section (how skinny the tire), the more pressure the tire can handle.
- It's best to check tire pressure before every ride. Low pressure causes flats. Do check your pressure at least once a week.
- Mountain bike tires (2.0 to 3.0) will usually tolerate pressures as low as 28-32psi without getting pinch flats or excessive sidewall roll. Tubeless setups are usually lower, 24-28psi. Many riders use 9-15psi for tires in the plus category. Larger profiles can are even go lower, as low as 6psi on 4" fat tires.
- A 10 degree temperature change will change the pressure by about 2%. Rim braking on a road tire could cause very high temperatures and dangerous pressures (especially if over inflated).
- Floor pumps are often off by as much as 5-15%. Use a good tire gauge to calibrate your floor pump and level-set your target mark on the floor pump dial.
- The rougher the road surface, the lower the pressure should be. A 120psi road setting would be too much on a rough road and actually be less efficient to pedal (tires deflect and bounce, causing heat and efficiency loss). The road bike will be more comfortable to ride and roll better at 100psi. Tubeless road tire setups benefit from lower pressures, usually running at 100psi, instead of 120psi, for a road tire. For a typical 2.2 MTB tire, a cross-country mountain bike may be best at 32psi, while an all-mountain would be be better at 28psi (or 25psi for tubeless). Equally, the more you weigh, and the harder you ride or corner, the higher the pressure will need to be. The new Plus size tires may run 8-15psi (tubeless), so make sure you check the rated pressure or the manufacturer's recommendations.
Low pressure may cause:
- Pinch flats - the tire compresses and pinches the tube inside
- Tire slippage - cutting the tube valve
- Tube abrasion - wearing out the tube inside
- Tire roll - tearing the sidewall or losing control
- Sidewall failure - tires sitting for a long time will crack at the flat spot made by the low pressure when the tire gradually goes completely flat
- Poor traction - the tire rolls off the tread area
- Bent rims - there is no protection from a hard hit
- Tire wear - the tire no longer wears where/how it is intended, so wears out faster
- Cracking - watch for cracks in the tire tread or casing - replace tries that are cracking
Trail-side Tire Repairs
Repair kit - what to carry to fix a flat tire.
Flat tires are a part of cycling. Every cyclist, from professionals to the complete beginner gets them, but don't fret - a puncture doesn't have to be the end of your ride. With practice you can change a flat in about 5 minutes and get back on the road. When you head out for bike ride, you should always carry the supplies needed to fix a flat, every time. Even if you don't know how to change a flat yet, bring these items anyway. Someone else might be able to help you. Here is a handy checklist:
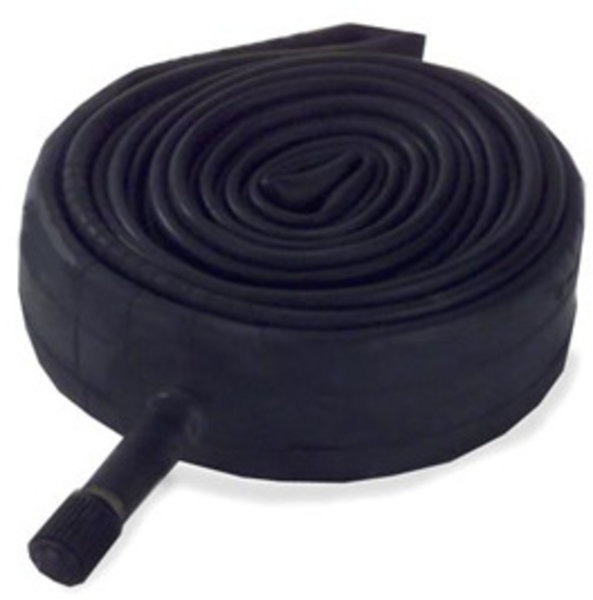
- A spare inner tube (or two, for longer rides)
- A tube patch kit. Old-school, but great in a pinch. You can get tubeless tire plug patch kits and tire boots too.
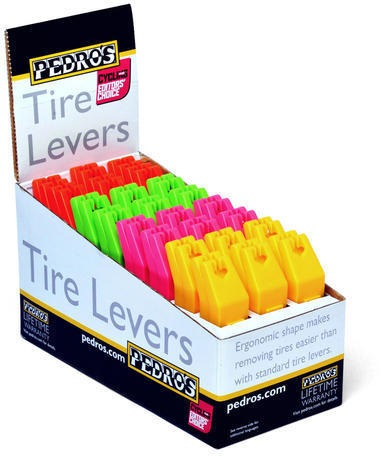
- Tire levers - invaluable for removing and installing the tire
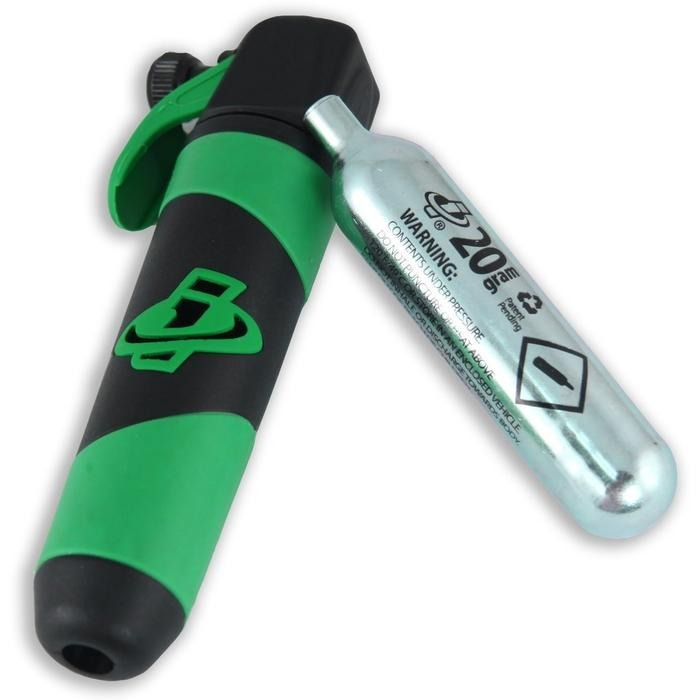
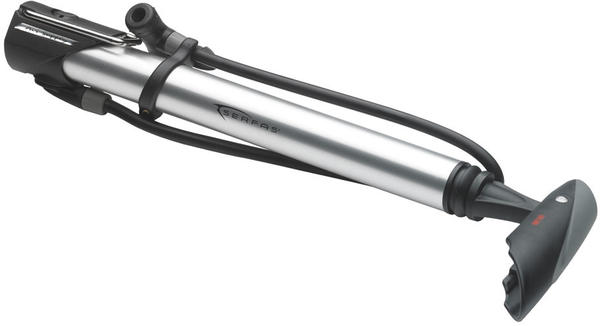
- Portable hand Pump or CO2 cartridge inflator
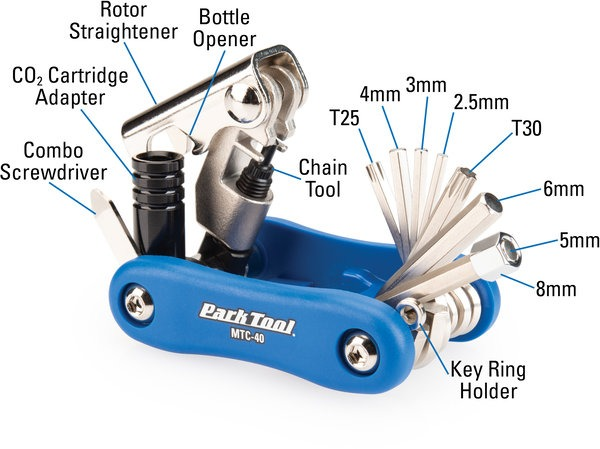
- Wrench to loosen your axle nuts or thru-axle (some bikes may require an Allen wrench)
- Before you start out on a ride, check your tire pressure.
 |  |  |  |
 | 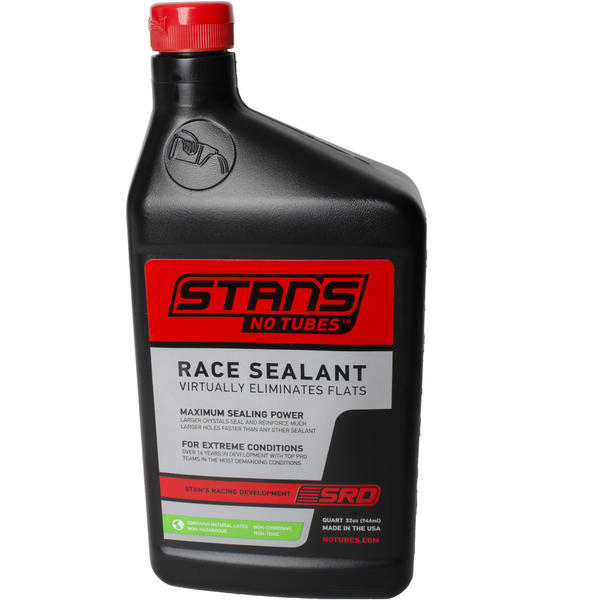 | 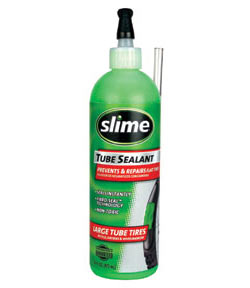 |  |
Heavy Duty. If you want to avoid most flats, Desert-Proofing your tires is a good investment. It provides three layers of protection, Slime tire sealant, a heavy duty tube, and a lightweight plastic liner. The Slime will seal any small punctures, the heavy duty tube works with the Slime to make a good barrier and better sealing and the liner guards against sharp objects. Our desert-proof option includes the Slime, tube, liner and installation. You may also do each choice by itself. Many customers simply add Slime, or Specialized Airlock, to the tube and that's it.
Tubeless. Alternately, if equipped for tubeless ready, going tubeless is exceptional. It's lighter and more reliable, especially for mountain biking. The only downside is you must have rims and tires that are made for holding a good bead and they do need to have the sealant refreshed every few months.
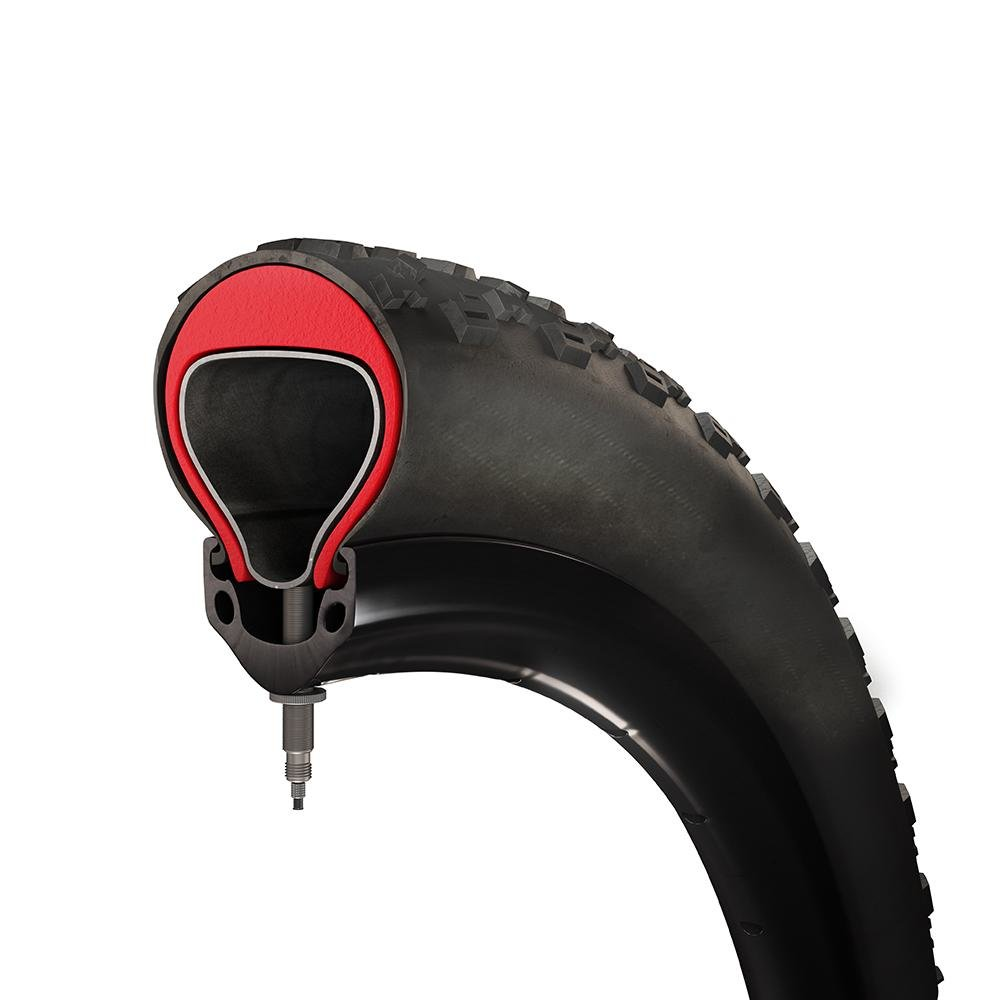
Lightweight Inserts. Just about any type of added protection from punctures adds to the weight of the tire and wheel. The lighter the tire, the more likely it will go flat. You must find a balance between protection and a heavy wheel. Also consider that the tire protects the rim from damage too. Light weight foam inserts, such as Tannus Armour, are a very popular choice because they don't add that much weight, allow for a natural ride and feel, and provide extra protection for the rim.
Have A Plan. No matter how you set things up, you still should have a backup plan in case you get a flat tire. Practice changing the tire at home so you are comfortable making a repair on the road. Be prepared.
Find the right tube or tire for your bike:
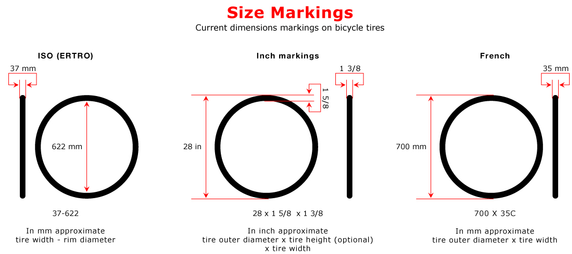
- Check your tube or tire size using the ISO metric system, for example, a 700 tire uses an ISO 622 tire/tube and a typical 26” tire uses an ISO tire/tube of 559.
- Only the ISO measures the actual bead diameter. For example: a 26 X 1.95 has an ISO of 559, but a 26 X 1 3/8 has an ISO of 590 (very different sizes).
- The ISO section (sect) size is also a fairly accurate way to judge how fat the tire is. For example, 700 road tires are usually 23-38mm wide, while 700 (or "29er") mountain bike tires are typically 48-58mm (1.9" to 2.3") wide. Yet, both the 700c and the 29er have the same bead diameter (622).
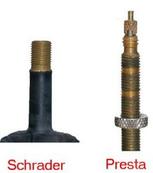
- Schrader valves are by far the most common valve. Presta or French valves are smaller and becoming much more common.
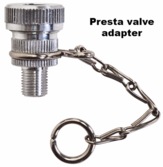
- An adapter can make filling Presta valves very easy from a Schrader-type pump.
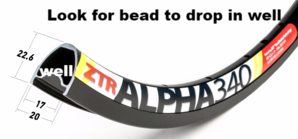
- All rims come with a well area to allow easy tire removal and installation. Getting the bead to drop into the well makes tire changes possible.
Older tires and rims can be confusing. If you are not certain, bring the tire and the rim to the shop for our experts to look at. |
When changing a tire, squeeze the bead together to get extra slack to pull the tire over the lip of the rim. Make sure the bead drops into the well all the way around. |
A Presta valve adapter may be used to fill Presta tubes from a Schrader valve pump. |
More about tire sizing
Imperial, Metric & American Tire Sizing
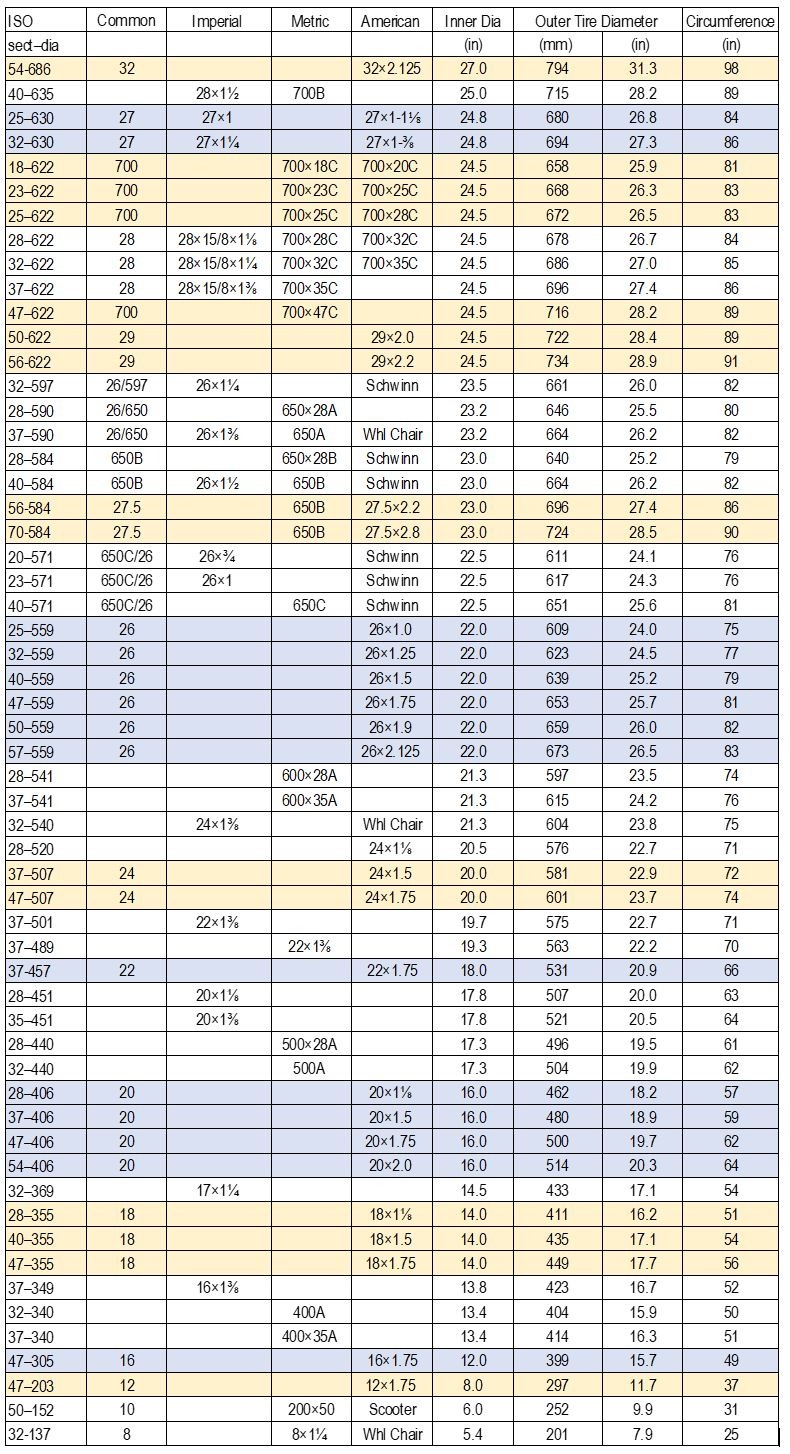
Sometimes you can’t find any ISO size on a tire, only the old familiar markings. Although they’re familiar they can be very confusing. Tires of same size come with lots of different markings: e.g. 28×1¼×15/8 or 28×1¾×1¼ or 700×32C are all 32–622. Even worse, the same or very similar markings can sometimes be found on completely different sizes of tire: e.g. 26×1½ is a whole inch bigger than 26×1.5. Refer to the column headed Imperial, Metric or American in order to work out what actual (ISO) size you have. The first two headings need no explanation. The American column is for tire sizes originating in the USA and where US markings may confuse. Note that American and Japanese branded road tires tend to be smaller than described and often lack any ISO markings.
Tire–rim compatibility
Two tires with the same ISO markings are completely interchangeable, even if one seems to be metric and the other is also marked in inches: e.g. 650B and 26×1½ are both 38-584. Road tires (700c) and mountain bike tires ("29er") are both 622. The newer 27.5 mountain bike tires are designated as 650B or an ISO of 584. Look for the ISO numbers and you will always know exactly what you need. Even some rims are now marked according to ISO with their bead diameter and internal section (width where the tire fits): e.g. 622–17 for the size are usually fitted to touring and hybrid bikes. But, some manufacturers give the overall width instead. Subtract 6mm from overall width to estimate the rim section, or simply measure the distance between the flanges. If the rim is not marked with its bead diameter you can read this from the tire – it’s the one dimension they have in common.
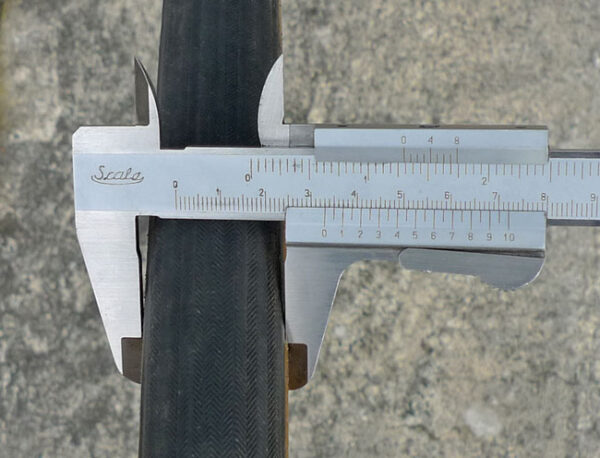
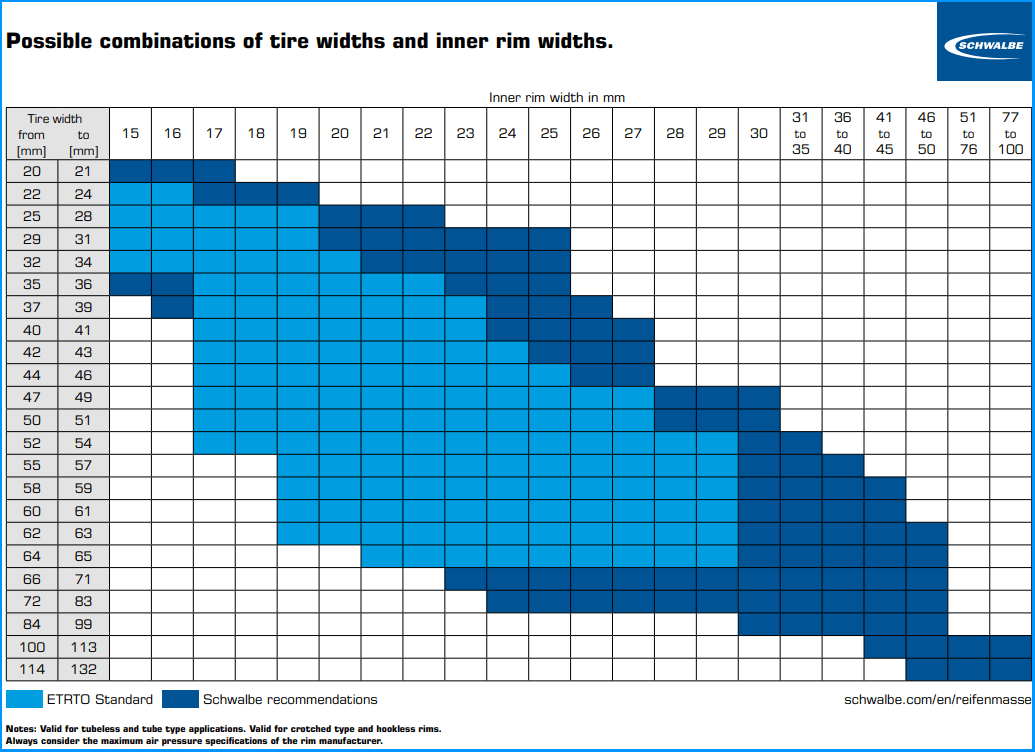
Tire width is complicated by how you measure it, what size rim it is attached and what air pressure. Two factors are important when looking at width, will it fit in the bike frame, and is it the right size your rim. Generally, tires will fit a rim that is 55% to 65% the tire width. On a 50-559, the rim should be about 1" to 1 1/2" wide.
Odd size tires
Watch out for tires that have unusual markings. Many tires, especially older ones, have the outside diameter listed. This is not the same as the bead diameter. You need the bead diameter to get the right size tire or tube. Look for the ISO metric size to get the right combination. Note: 12" tires are usually marked as 12-1/2 X 2-1/4. Strange, but true.
Shopping
When you go shopping for a tire, you will notice that the measurements are not precise. This is because there are no universal standards for measuring tires. For example, the width of a tire on a 15mm rim is very different when mounted on a 30mm rim. Similarly, you may have a 28” tire. However, the internal diameter is 622mm, more commonly called a 700c. How the tire fits on your rim and the clearance from the frame can vary considerably among brands. Things to consider:
- Tire pressure
- Type of tread
- Tubeless versus tubed
- Rim width
- Rim diameter versus the actual bead seat (how tight the bead is on the rim - e.g., tubeless rims/tires fit tighter)
- Thickness of the casing (e.g., race versus puncture resistant)
- Tire profile (round, oval or square)
- Clearance (width between frame, the height of the tire, interference with derailleur or chain)
- Measurement system (ETRTO/ISO, common, Imperial, Metric, American)
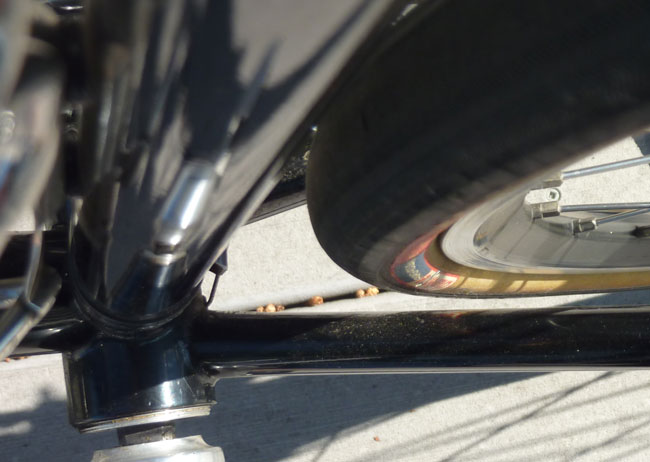
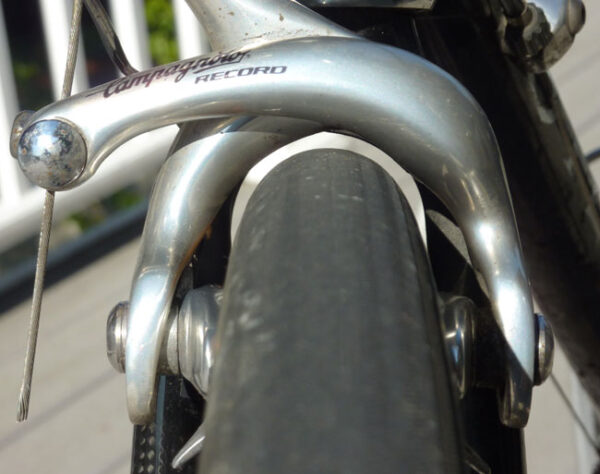
Check all around your wheels how much clearance you have between the tire and frame/fork/brakes. The most important are:
- Fork crown
- Brake calipers (front and rear): squeeze your brakes to get the clearance when you’re braking
- Chain stays
- Seat stays can limit the clearances on some bikes
- Seat tube
- Fenders: often, you can adjust the fenders to eliminate a tight spot.
We recommend a minimum of 3 mm clearance between your tires and the closest part of your bike. Any less, and you risk having your tire rub under hard acceleration or if the wheel develops a slight wobble.
 |  |  |
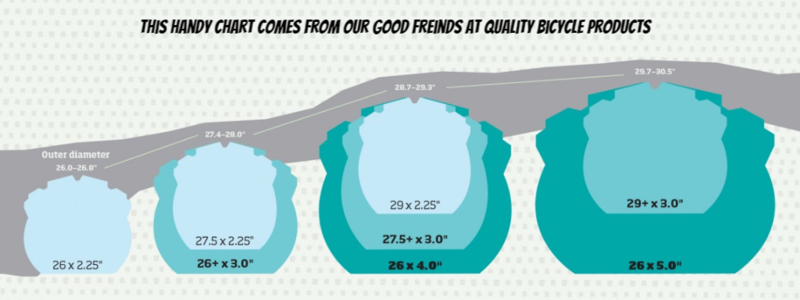
Use this handy chart to find the right tire:
General Bicycle Maintenance
Regular bicycle maintenance is critical to the health of your bike. Water and sun are the most significant contributors to bike failure. Below is a list of common tasks that a typical bicycle owner can do to keep their bike running smoothly all year long.
- Keep the bike stored out of the sun. The Arizona sun is extremely hard on your bike. It deteriorates the hand grips and tires very rapidly. Look for cracking on the tire. When this happens, the tire could fail unexpectedly. Weather checking, or small cracks, are common on tires and the most significant point of failure beyond worn tread.
- Look at your tire tread. Worn tread makes the bike harder to control on the pavement or the dirt. It also could let the tire burst at thin spots. Replace tires before the tread is down to 20%. Make sure you still have the ridges or knobs, even at the center. Besides, new tires look good and handle great and can give your ride a great lift.
- Keep your bike dry. Store your bike in a dry location. Rust can occur in hidden places, compromising the frame. After a wet ride, rinse the bike and dry it off for storage.
- Keep the bike clean. A dirty or greasy bike can hide defects. Even your chain should be kept clean of grease. Water can get into the bearings and frame, so make sure the bike has a chance to dry completely. Turn it upside down to get water trapped in the seat tube or other parts of the frame. Never pressure wash or spray the bike. Use mild soapy water to clean and a light sprinkle of water to rinse. Clean oil accumulation on the frame and other parts with a good bike cleaner.
- Clean the bike chain. Every few rides, clean your chain and put on fresh oil. There are many products you can use to clean the chain, on or off the bike.
This keeps dirt from eating away at the inner part and the chain from rusting. After all, some chains can cost over $100. The outer part of the chain should be free of grease and oil. When you do oil the chain, just put one small drop on each link, then wipe the chain clean. - Check the air in the tires. Keep tires inflated to their rated pressure. This helps prevent the tire from sliding and cutting the air valve or tearing the tube. It also guards against pinch flats. More importantly, the right air pressure helps you control the bike and makes pedaling more efficient. Check the air before every ride. Tires can lose air pressure every day. Pressure loss is deceptive because it permeates from the tire (think like evaporation) faster at the beginning and slower as the pressure drops. Worse, a bike sitting on a flat tire will damage the sidewall quickly - so fix flats right away.
- Get a checkup or tuneup. New bikes especially can have things get out of adjustment or bolts come loose. Get your bike a tuneup at least once a year. Get fresh grease on all the bearings. Check everything for tightness. This will keep your bike happy for many years.
Oil Your Chain
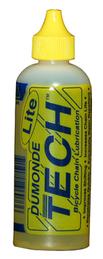
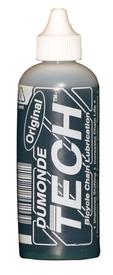
Always use a good quality bicycle-specific chain lubricant. Dumonde Tech chain lube is a liquid plastic and through polymerization forms long-lasting plating on all chain surfaces. The benefits of Dumonde are:
- Dumond forms an extremely low-friction plating
- Plating bonds to chain and can’t be washed off
- Components stay cleaner, last longer and run quieter
- Extremely durable, outlasts all other chain lubes
- Environmentally sensitive and saves money
- Is applied sparingly unlike many other other lubes
Lite and Original Bicycle Chain Lube (BCL) differ only in their concentration. Original BCL is more concentrated for exceptional durability under the most challenging conditions - like mountain biking or motorized gas or electric bikes.
In our shop, we use Dumonde BCL on cables, pivots points and seals. It is safe on plastic, rubber, and all sealing materials. The product is designed to not harm your components. It is eco-friendly and environmentally sensitive, is engineered to perform with minimal “carbon footprint” by not washing off in water, is used sparingly, lasts longer between applications, resulting in longer drive chain life. It even works in the extreme cold conditions.
To prepare for maximum performance from BCL, use a high quality solvent, to thoroughly clean, and then dry the chain, before the first application. You will only need to clean the chain once, prior to the first application. Over several rides, 2-3 applications are required for the bonding process to occur through polymerization. Apply BCL sparingly (apply one drop at a time to each link, until every link has been lubed), then wipe off excess lubricant with a clean cloth to the point where the chain’s outer surface appears dry. One ounce of Dumonde Tech BCL will give you many applications. Re-apply BCL after several rides, listening to your chain sound, not appearance or time, as the best indicator of when the chain needs a reapplication of Original. Use mild soap and water to clean between applications.
Oil only belongs inside the pin of the chain. The outside should be wiped clean. As well, the front chain rings and rear cogs should be free of oil and dirt. Dirty and oily drive trains attract sand and dirt that eats away at the drive surface. Keep it all clean.
Check Your Drive Train
Always keep your drive train clean. Oil should be inside the chain, not outside. Outside oil collects dirt and gets your leg greasy! Check the chain line and look for chain rubbing on the derailleur before every ride. It is easy to inadvertently bump the derailleur offline, causing poor chain alignment and dropping the chain. It is common for a chain to come off from a hard bump, shifting under too much pressure, or poor shifting technique. Keeping the chain maintained and in good alignment will help you avoid premature wear or a dropped chain.
Your chain wears out first. If not replaced when worn, it puts extra wear on the chainrings and rear cogs. Normally, you can replace your chain twice before replacing the chainrings and cogs. However, if you let the chain go, you must replace other parts sooner. Worse, worn cogs and chainrings will damage a new chain.
A good method for checking chain wear is by measuring it with a ruler. Park Tool© has some great advice on this (Chain Check): "Pick a rivet and line it up at the zero mark. Count 23 more rivets, and your last rivet should be at the 12” mark of your ruler. If it is off by more than 1/16” your chain is stretched to the point of replacement." Note that chains are not worn on the outside; they are worn out on the pins inside. In other words, you cannot tell if a chain is worn out just by looking at it.
According to Park Tool©, you can make a quick check by looking for slack when the chain is wrapped around the big chain ring: "If [the chain] lifts off the chainring to the point where you can see a lot of daylight [1/4"] between your chain and chainrings, you’ll either need to replace your chain, or you are fast approaching the point of replacement. It’s nearly as accurate as using the proper tool, but it’s a good starting point if you haven’t replaced your chain in a while."
Look at the teeth on your drive chain. Often, they will be visibly worn into sharp points at the tooth, especially on small cogs. A worn cog will allow a new chain to be slack when wrapped around the cog. Any slack by a new chain around a cog indicates wear. It's probably time to change them all out. As well it's best to replace all the cogs and chainrings at the same time, regardless of individual wear.
Visit our store to buy chain tools by Park Tool©. We carry a very large selection of tools for the professional and home mechanic (Park Tool Bicycle Tools).
Here is a link to a Park Tool video on how to check your chain.
New Mountain Bike? Follow this very important first step
Set the SAG and rebound on you air shock/fork.
SAG is the amount of travel on your fork or shock from your static body weight and the bike. Shocks are designed to operate best in the middle third of their travel. Essentially, your goal is to have the bike in the middle third 80% of the time. Secondarily, SAG should be set so you don’t bottom out on hard hits or big G-outs. Some shocks/forks do have the option to insert small tokens or bumpers to cushion the last 10% of travel, allowing you to have a softer SAG setting, but still prevent bottoming out. As a guideline, cross-country and fast flowing trail terrain, target around 15%-25% SAG, to ride a little higher in the stroke and maintain a firm feel (bikes with about 100mm of travel). For all-mountain and steeper more challenging terrain, target around 30% SAG, to keep the ride in the middle third (bikes with about 140mm of travel). For downhill and fast technical terrain, target around 33% SAG, to ensure you take advantage of the full travel available (bikes over 150mm of travel). Your riding preference will also determine your personalized SAG setting. Some like less SAG for a firmer ride, while others prefer a plush ride. Experiment to get to your preference. After every change you make, be sure to cycle the shock or fork at least 30 times to ensure equalization of air pressure.
To set your rear shock, adjust the initial air pressure according to your weight and the manufacturers recommendations. Open the compression adjuster all the way (soft). Using a helper, carefully get on the bike, sit in a neutral position, reset the O-ring and observe how far down you compress the shock. Dismount easy and verify you are between 25% and 33%. Add or let air out depending on your goal. Check your setting after every ride to verify that you still are in range. Look at the O-ring or dirt line to see if you are using your range as expected and not bottoming out.
To set the forks, use the same procedure as the shock, but you will need to pedal around some. Open the compression adjuster all the way (soft). Get on easy, ride smoothly and don’t come to an abrupt stop. Most forks have a chart for a starting weight to air pressure setting or you can look it up on their website. Either way, you SAG goal is the same. As with the shock, check your dirt line after each ride.
Next, set the rebound. This controls how fast the shock returns to normal (bounces back). Adjust your rebound slower by turning it in all the way. Unscrew the rebound adjuster and count each click. The more you weigh (higher air pressure), the slower the rebound will be. Start at the manufacturers recommendation for rebound, based on the air pressure you set. Screw the rebound adjuster all the way in and back it out between 30% and 50% of the total clicks. Your goal is for the shock to not kick you when you go over a big bump and off a jump. Too much rebound will cause the shock to stay too low in the stroke and result in a harsh ride. For the fork, your goal is a plush feel and the fork to not push you out of the corners. As with the shock, start at the manufacturers recommendation or 30% to 50% out from fully screwed in.
Having your SAG and rebound set properly will allow you to get the full benefit of your bike. It will balance the front and rear action and vastly improve your control. Adjust in small increments so you can find your sweet spot. Now go out and ride.
